
Hydroponics, Uncategorized
How To Build a Dutch Bucket Hydroponic System
Read this article to learn how to build a Dutch bucket hydroponic system using common items you can easily find at a hardware store.
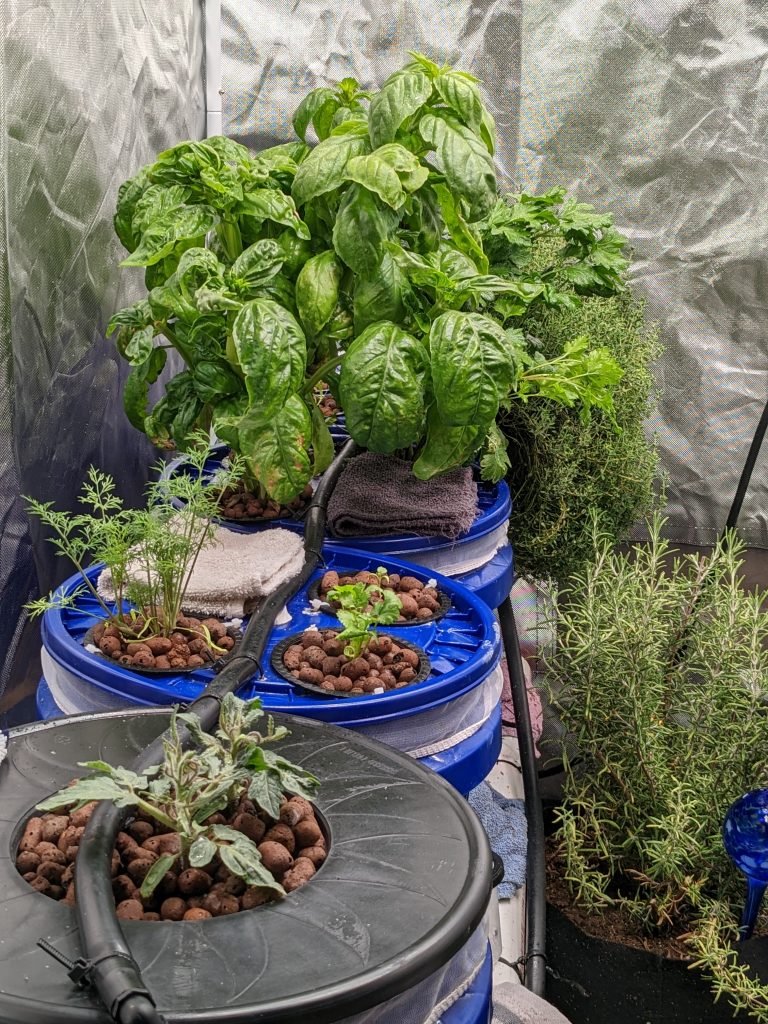
Getting Started
Installing the Bulkheads
Start by drilling a 0.5″ diameter drainage hole approximately one inch from the bottom of four, 5-gallon hardware store buckets. The bulkheads that I like best are often sold as beer brewing supplies, they come with two rubber o-rings that straddle a threaded bulkhead insert and cover each side of the bucket to maintain a water-tight seal.
Rinsing the Perlite
Line each bucket with a mesh paint-strainer bag and fill it with perlite. Rinse each bucket until the water runs out clear, and set them aside for later.
Creating the Return Reservoir and Bucket Platform
Collect a 10-gallon storage container, 4×2-ft hobby board, a 4-ft section of 2 inch ID HDPE drain pipe (with an expanding insert end-cap), and a four foot section of square-end wooden dowel.
Measure the height of the storage reservoir and cut two dowel sections of identical length. to match the height of the reservoir. Using the reservoir as a bench, secure each leg to opposite end of the wooden board using a minimum of one nail and one screw (wood glue is also recommended). Allow the wood glue to dry (if used) and coat the entire bench with a weather-proof lacquer (I used Olympic WaterGuard).
Installing the Return Pipe
Create a hanging point for the return spout by gently placing a nail at the top of one bench legs at the far end of the platform. Rest the opposite section of spout on top of the reservoir lid and use a marker to outline the path of the return pipe. Mark the reservoir with a sharpie to remove material under the return spout so the desired drain slope is achieved.
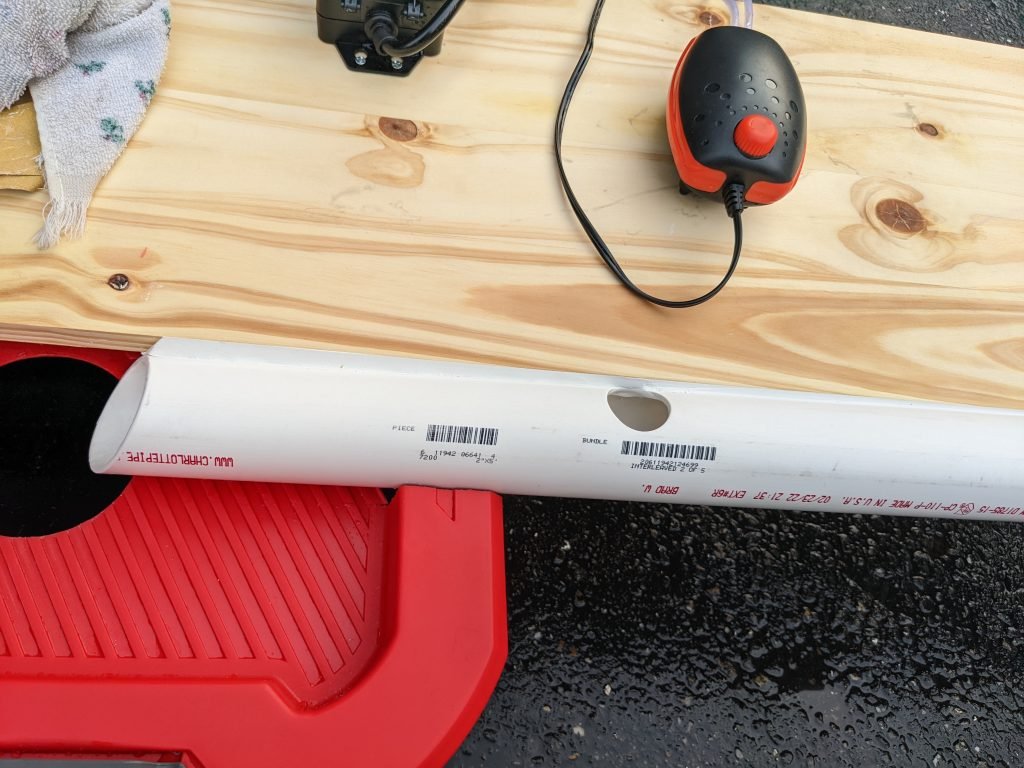
Cut the return pipe to a length that ensures it will terminate directly over the reservoir, then cut away sections of the reservoir lid until both of your hands can fit inside it. Insert end-cap at the elevated end of the drain pipe.
Place the buckets in their respective locations and trace out the outline of each bulkhead spout on the return pipe. Using a core drill (not a woodboring spade!), measure and drill three spout locations into the return pipe approximately 0.5″ wider than the outlet of the bulkhead. The first bulkhead should be positioned directly above the reservoir itself.
Attaching the Net Cups
Place the lid onto each bucket and carefully measure and mark the location for the center of each net cup, placing a square pattern of four marks on each lid. Carefully compare the drill bit diameter to the dimensions of your 4″ net cups before drilling the plant locations. Next, drop in the net cups and drill small holes in the opposing sides of each net cup and a corresponding hole in the bucket lids. Then securely fasten each side of the net cups to the lids using zip-ties.
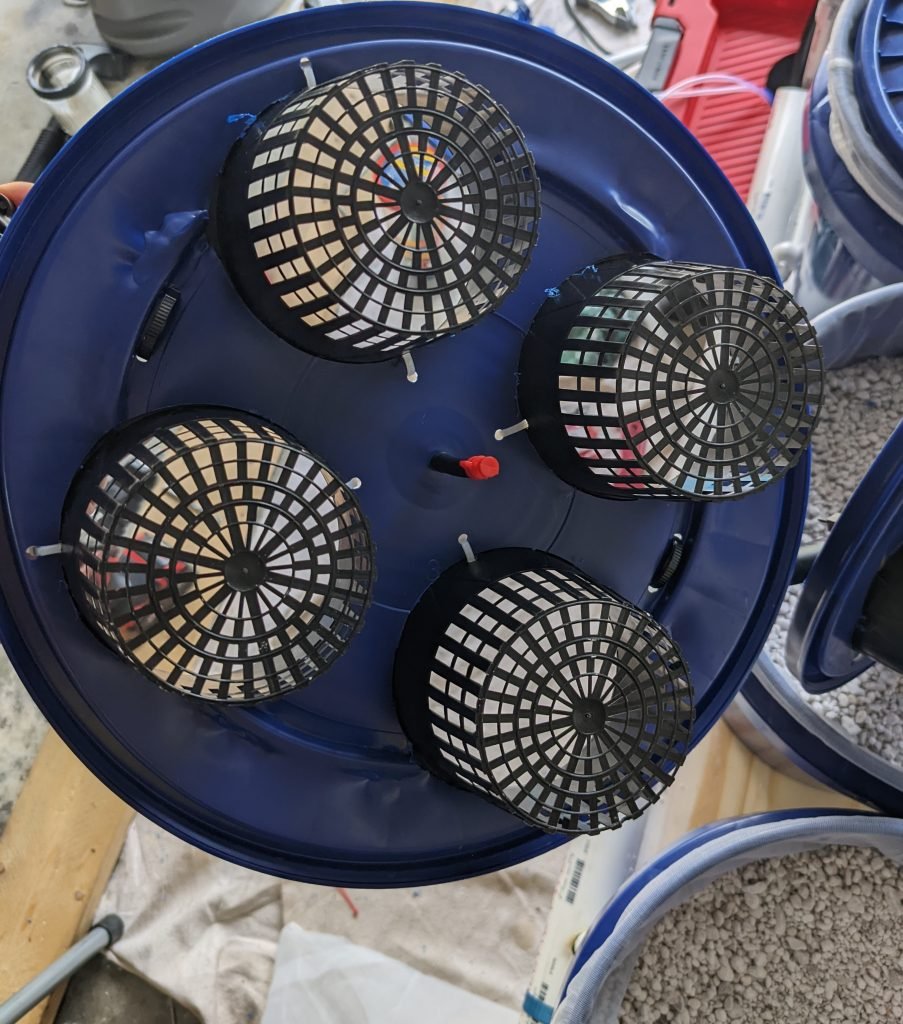
Depending on the shape of the lid, you may want to remold the surface with a heat gun so the net cups will rest flat when they are inserted. This is best accomplished once the holes have been drilled and by pushing a net cup into the lid while heating it, and while using a bucket for support.
Inserting the Sprayers and Feed Line
Place the lids on each bucket, squaring up the net cups with the sides of the bench. Mark a center location for a sprayer head to be inserted and drill a hole identical to the width of the feed line. Next, lay a 4.5 foot section of 0.5″ vinyl tubing over the lids and carefully puncture holes at each spray head location. Attach the sections of drip tubing to the main feed line using barbed connectors and then gently push each section of tubing through the center of the lids. Carefully shorten each sprayer head until the sprayer makes contact with the side of each net cup, then reconnect the 360 spray nozzles and seal the lids.
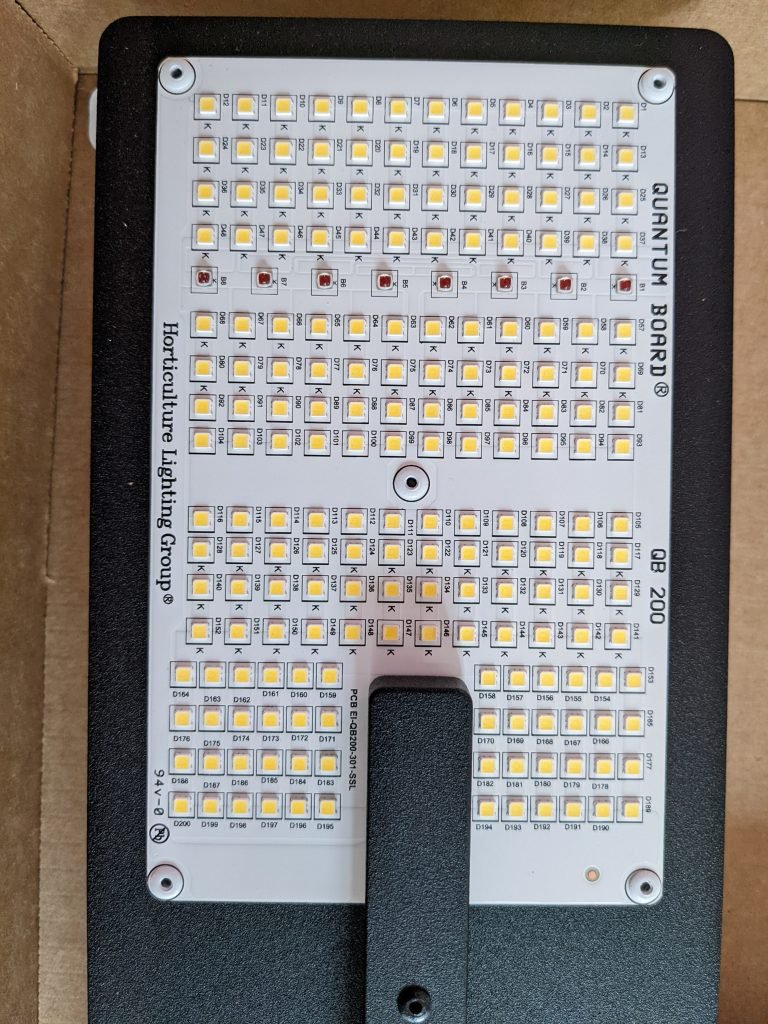
Above: a full spectrum light-emitting diode (LED) array panel.
Cut the main feed harness, allowing for some play at each end. Connect a 3 foot section of 1/2″ vinyl tubing to the outlet of the submersible pump and connect it to the front of the feed harness with a 1/2″ barbed elbow fitting. Connect an elbow, followed by a ball valve and a 6 foot section of vinyl tubing to the other end of the feed harness. Place the end of the 6 foot tube into the reservoir, then drop a two air stones into the basin and turn on the aerator pump.
I zip-tied a 6-foot 3-outlet 15 amp extension cord to the side of my system and used it to power my submersible pump and air stones. Connecting an indoor/outdoor programmable timer to the bench is also not a problem, however the submersible pump should remain on at all times.
Congratulations!
That’s it! Your hydroponic system is ready to go. Just mix in your nutrient formula, turn on the pumps, and hear it purr. My favorite nutrient system is the MasterBlend 3-part formula system. You can adjust the pH with sulfuric acid from any hardware store.
What Can I Grow in a Hydroponic System?
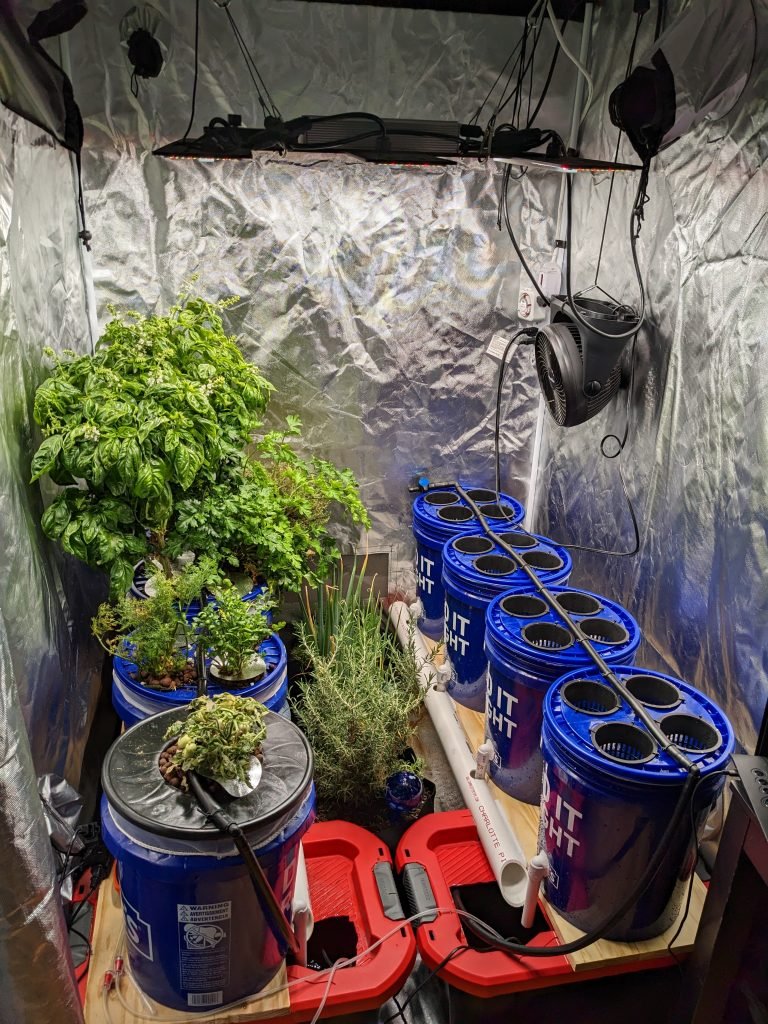
Not everything grows will grow well in a hydroponic system, however hydroponic systems can be designed to emulate almost any type of growing conditions. Obviously, underground vegetables such as carrots and potatoes do not grow well in rockwool and clay pebbles. Some hydroponic growers have had positive results using coco coir instead of perlite and expanded clay (hydroton). The following plants are known to grow very well in hydroponic systems:
- Tomatoes
- Peppers
- Rosemary
- Lettuce
- Lavender
- Green Onions
- Strawberries
- Cilantro
- Mint…
Should I Get a Hydroponic System?
Hydroponic systems have several key benefits compared to soil gardening but comes with many of its’ own unique challenges. Benefits of hydroponic gardening include healthier and faster growing plants, minimal space requirements, enhanced nutrient delivery, better control options, and easy clean up.
When assembled correctly, hydroponic systems can be almost completely automated and require very little maintenance compared to a soil garden. On the other hand, an improperly assembled hydroponic system suffer from leaks, pH imbalances, dried up root systems, clogged sprayers, and other problems. So an ounce of prevention is worth a pound of cure!
What Should I Feed My Plants?
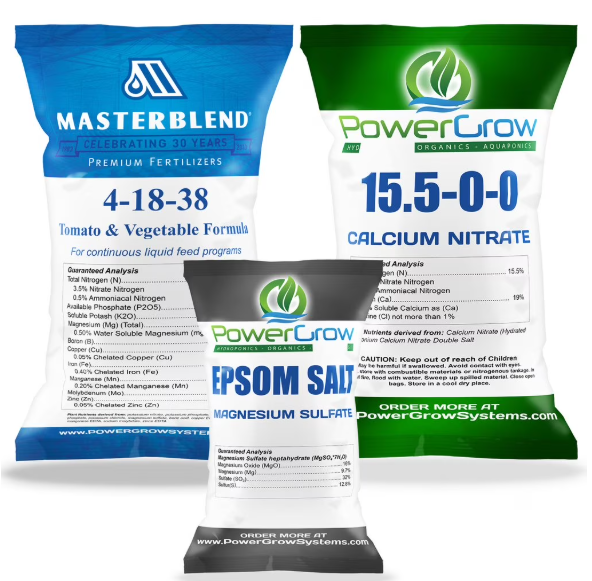
I like to use a mix of Masterblend 4-18-38, calcium nitrate, and Epsom salts (magnesium sulfate) in my garden. I mix these ingredients one at a time using a 5 liter pitcher, and continue adding water until I reach a total volume of 30 liters.
Why Do I Need to Adjust the pH?
Hydroponic solutions contain high levels of nitrogen that microbes use in their metabolism. These microbes secrete amines as a byproduct, which can produce an elevated pH and a fishy smell in your hydroponic system. These conditions promote the growth of pathogenic organisms that can harm or cause illness to your plants. The best way to eliminate these problems is to ensure a balanced and healthy pH range of about 5.5 – 6.5.
The good news is that Dutch bucket hydroponic systems typically do not require much pH adjustment compared to other systems, as long as the water continues to circulate. A pH adjustment should be performed at the same time as the solution preparation, which is an action I typically perform about once a week.
To control the pH as naturally as possible, do not allow the nutrient solution to stay dormant for more than an hour or so. Impulse timers are great for this. Always remember to avoid leaks by design, and keep the reservoir and root beds concealed from excess light to reduce the growth of photosynthetic organisms.
What Should I Use to Adjust the pH?
The most effective solution in terms of cost and effectiveness is concentrated sulfuric acid. Plants are remarkably insensitive to sulfates, and most common pH products (for example: “pH Down”) are really actually just sulfuric acid with a couple of added buffers for shelf-life stability. I recommend using Zep brand Sulfuric Acid, which costs about $10/liter at a hardware store. Concentrated sulfuric acid is commonly marketed as drain cleaner. Just make sure you buy the right kind.
I Think I Messed Up the Solution, How Do I Check the pH?
Turn off the pump and collect a pH measurement (desired value is between 5.0 and 6.5). If the solution requires adjustment, add approximately 0.5mL of Sulfuric Acid using a transfer pipette. Stir the solution and collect an additional measurement. If the adjusted pH falls below 5.0, carefully add a teaspoon of baking soda and stir. Repeat the adjustment if necessary.
Note: Never adjust the pH of your nutrient solution without measuring it. Adding too much acid to your hydroponic solution can hurt your plants and cause damage to your hydroponic system. There is no way to know how much acid to add without measuring it. I typically add around 2.5 mL of Zep Sulfuric acid per 30 Liter batch of nutrient solution. I like to mix it with a drill and a clean paint-mixer attachment in a spare 5 gallon bucket.
Keep Your System Covered
Remember to keep your net cups covered or filled with expanded clay pebbles when not in use. This is to conceal the interior surfaces from light and prevents algae from taking up a foothold inside the system.
When Should I Transplant My Seedlings?
Transplant your seedlings once roots begin to emerge from the bottom of the starter plug. Remove clay pebbles from the net cup until the pebbles are wet from the sprayer head. cover the sides and top of the plug with the clay pebbles. Spray the pebble bed with water until the root system is strong enough support to the new seedling (usually around 1-2 weeks).
